In this post, I’m going to be showing a recipe for how to add syntax highlighting and code segments to a decoupled Drupal site. Want to see an example? It’s right in front of you! The code blocks down below use prism.js, React and Code Snippet module, just as they explain.
First, install Code Snippet module on your Drupal 8 site. This module integrates the “codesnippet” ckeditor plugin, which provides a button that does the following:
- It gives editors a WYSIWYG button that lets them choose a language and embed a code snippet.
- Behind the scenes, it escapes and encodes the pasted code segment so that html tags and php tags do not get stripped.
- Provides a pretty good visual treatment of the code segments when displayed in Drupal. (You could just use this if your site is not decoupled, but I’ll be going one step further to show how to apply syntax highlighting in React).
Get Code Snippet via Composer, like this:
composer require drupal/codesnippetYou also have to put the library in place. First, add the following to your projects composer.json
 {
    "type": "package",
    "package": {
        "name": "ckeditor/codesnippet",
        "version": "4.11.4",
        "type": "drupal-library",
        "dist": {
            "url": "https://download.ckeditor.com/codesnippet/releases/codesnippet_4.11.4.zip",
            "type": "zip"
        }
    }
},
Check for the most current stable version. Next, require the new package using Composer CLI
composer require ckeditor/codesnippetAfter that’s done, turn on the module
drush en -y codesnippetNow it’s time to add the code snippet tool to one of your WYSIWYG profiles on a text format. In our case, we have WYSIWYG UI on the “Full HTML” text format.
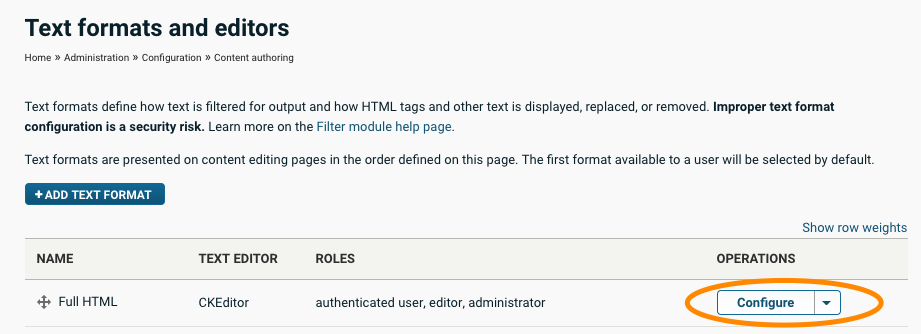
Navigate to Content Authoring > Text Formats and Editors (/admin/config/content/formats), and configure the text format containing the WYSIWYG profile you want to modify:
If you have installed Code Snippet module and its library correctly, you should see a little button in the ckeditor staging area that looks like this:

Drag that down into the active buttons tray, and save.
It’s time to edit one of your articles and try out the new code snippet tool. Once you’ve found an article, edit and verify that the code snippet icon is there. Give it a click, and you should see a modal asking you to paste in some code:

Time to show off your code! You’ll find the Code Snippet module to be quite nice - as you add code blocks, it styles it pleasantly in the WYSIWYG area and also when you view the node:

Are you building a decoupled site? No? Then you’re done!
If you are stopping here, I will give one warning - Code Snippet module uses highlight.js, and it is a big boy. It has the same problem as the date library moment.js: in most cases, you will only want to use a small subset of its many languages, but it comes packaged with everything. On its own, this probably won’t totally kill your site’s performance, but it definitely won’t make it better. It will stick out like a sore thumb the next time someone does a frontend performance audit.
But let’s move on - this article is mainly about syntax highlighting for decoupled sites. Let’s pretend you are building a Gatsby/React blog that gets its data from Drupal.
What we need is a syntax highlighting library that can be pulled in language-by-language, so that the bundle size stays small. I looked around for a while, and the best one I found was Prism.js.
At this point, I could probably point you to this article explaining how to add prism.js to Gatsby sites and call it a day. I’m going to repost some of that but also add a few things.
First, let’s install the prismjs npm module and some required Babel plugins.
npm install --save prismjs babel-plugin-prismjs babel-preset-gatsbyThen, add this to your .babelrc (create this file in your project root if it doesn’t already exist):
{
  "presets": ["babel-preset-gatsby"],
  "plugins": [
    ["prismjs", {
      "languages": ["javascript", "css", "markup"],
      "plugins": ["show-language"],
      "theme": "okaidia",
      "css": true
    }]
  ]
}
Once you’ve got it working, you can customize these settings.
We’re almost done. The last piece of the puzzle is actually applying prism.js to your pages. There are a lot of ways to do it, but the simplest is telling prism to highlight all viable code tags it finds. Let’s say you have a “Body” component that you use to render WYSIWYG content from your CMS. You would invoke the prism.js highlighting like this:
import React, { useEffect } from 'react';
import reactHtmlParser from 'react-html-parser';
import Prism from "prismjs";

const Body = ({children}) => {
 const options = {
   decodeEntities: true,
 };

 useEffect(() => {
   Prism.highlightAll();
 });

 return (
   <div>
     {reactHtmlParser(props.children, options)}
   </div>
 );
};

export default Body;
Note that reactHtmlParser is just a useful tool for rendering WYSIWYG content, rather than using dangerouslySetInnerHtml.
At this point, if you do a Gatsby build (or if you’re not using Gatsby do whatever it is needed to hydrate this React component), you should see syntax highlighting in all its glory.
Now .. if you are astute .. you might be a little confused. Doesn’t Code Snippet module provide code tags that work with highlight.js? And aren’t we using Prism.js on the frontend? Sure, they both work with code and pre tags, but aren’t the class conventions different for setting language?
Turns out It Just Works™. This is really lucky! Both libraries use “language-<language>” as their class naming convention. Still, it’s worth remembering that this is somewhat brittle. One could solve this problem by contributing a plugin for prism.js to the Code Snippet module.
I hope you found this useful!