At DrupalCon Seattle this year, Mediacurrent was excited to unveil our latest distribution and Gatsby integration. Rain is a group of prepackaged, pre-configured components vetted by our development team and sourced from the open source community.
Our goal it to help web teams create, configure, and deploy websites faster. This tutorial will show you exactly how to get up and running end-to-end. You can also follow along with our tutorial videos.
Step-by-step guide to get started with Rain, Gatsby, and Netlify
- Installing the Rain distribution
- Enable JSON:API
- Hosting integration
- Setup Gatsby
- Configure Netlify
- Connect Drupal 8 to Netlify
Step 1 - Installing the Rain distribution
There are many ways to spin up a new Drupal 8 instance. In this tutorial we will use Mediacurrent’s open source Drupal project template which is available for download on Bitbucket. This repository includes everything you will need to get up and running including VM, Guardr security integration, the Rain install profile and more.
First you will want to create a repository wherever you typically host your Git projects (i.e. Github, Bitbucket or Gitlab). Once you have that setup you can clone Mediacurrent’s repo and point the origin back to your Git repo.
Example:
git remote set-url origin git@bitbucket.org:mediacurrent/shortcode_project.git
Next you will want to initialize the project. You can do that by running the following commands with your local host name and IP.
Example:
composer install

composer drupal-scaffold

./scripts/hobson project:init example.mcdev 192.168.50.4
Finally, to build the project and run the install you can simply run “./scripts/build.sh” which runs composer install as well as the Drupal install. Note that the project README has more detailed instructions but this will give you an idea how to get up and running quickly.
Once you have completed your install you will want to push updates to your git origin.
Step 2 - Enable JSON:API
In order to make our Drupal 8 site provide data to the Gatsby frontend we will enable the JSON:API module added to core in version 8.7. The Drupal 8 source plugin for Gatsby requires JSON:API to ingest content from Drupal but eventually a GraphQL module-based source plugin will replace the need for JSON:API.
Mediacurrent has a Packagist feature module that makes this process a little bit easier because it will also add some test content we need to get Gatsby running out of the box. Otherwise, you would have to manually create any paragraph being used in our Gatsby starter.
To add the Rain Gatsby feature simply run the following command:
composer require mediacurrent/rain_gatsby
After the Rain Gatsby feature is downloaded you will enable the feature which in turn enables JSON:API and creates 1 test page with paragraphs. When you have completed this step, be sure to export your configuration and push any file updates to origin.
Step 3 - Hosting integration
Most Drupal web hosts (e.g Acquia, Pantheon, etc.) have their own git repository they use for deploying artifacts to the server. This includes all the actual Drupal files that make up core, contributed modules and libraries. We don’t want our source git repository to store artifacts or conform to the folder layout required by the web host. Instead, we execute deploy commands to build the artifacts from Composer and commit them to the appropriate destination git repository. To make that process easier we have some additional configuration to add to our config.yml file that instructs how and where code should be deployed.
The key aspects to both the Acquia and Pantheon configuration is pointing the release repo to the appropriate git URL provided by your host, the name of the host and the release drupal root directory. Our examples use Acquia and Pantheon but also support generic git artifact repositories like AWS.
Acquia config:
project_repo: git@pathtomysourcerepo.git

release_repo: mcABCProjectname@svn-1234.devcloud.hosting.acquia.com:mcABCProject.git

release_drupal_root: docroot

deploy_host: Acquia
Pantheon config:
project_repo: git@pathtomysourcerepo.git

release_repo: ssh://codeserver.dev.YOUR_UUID_VALUES.drush.in:2222/~/repository.git

release_drupal_root: web

deploy_host: Pantheon
Additionally for Pantheon you will need to add a pantheon.yml file to the root directory with the following values:
api_version: 1

web_docroot: true

php_version: 7.1 (or latest PHP version supported)
This command also needs to be run in order to clean up the Pantheon git repo prior to our first deployment:
rm -r README.txt autoload.php core example.gitignore index.php modules profiles robots.txt sites themes update.php vendor web.config
Now we are ready to build and deploy for the first time. We do this with two commands, one to build the artifacts and one to push files to the release git repository.
Example (using Pantheon):
./scripts/hobson release:build Pantheon develop

./scripts/hobson release:deploy Pantheon develop -y
After you have deployed code to Acquia or Pantheon you should be able to run a clean install using either the sample Rain child install profile (mis_profile) or cloned profile you have created (see Rain README for more details).
Step 4 - Setup Gatsby
To connect your Drupal instance to Gatsby, at a minimum you just need the Gatsby source plugin pointed to Drupal’s JSON:API endpoint. For those new to Gatsby, it can be a lot of work to map your components to Drupal content using GraphQL.
In order to make this whole process quicker and easier, Mediacurrent created a Gatsby starter (available at https://bitbucket.org/mediacurrent/mis_gatsby_rain/src/develop/) that does a lot of the initial component development for you. Our Gatsby starter includes React components with GraphQL that maps to the Paragraphs data incoming from the Rain install profile. Any time you change a Paragraph you will need to adjust your components and GraphQL but it’s much easier than building everything from scratch. The components also include basic markup, styles and in some cases Javascript to give developers something working right out of the box.
Spinning up the Gatsby + Rain starter is very simple, and uses the same syntax as other Gatsby starters. See the example below:
gatsby new my-rain-starter https://bitbucket.org/mediacurrent/mis_gatsby_rain
In the next step, we will point Gatsby to the appropriate JSON:API feed coming from our Drupal environment. Since this value will change per environment we have already created a variable named “BASE_URL” in our gatsby-config.js file. To set this value, you simply add BASE_URL to a .env variable in your docroot. Important: remember to include the trailing slash and you do not need to add “/jsonapi” to the path. See below:
BASE_URL=http://myproject.mcdev/
To test simply run the following commands (note that this assumes you have NVM installed):
nvm use

nvm install

npm install

npm run develop
If you are able to run without error you are in good shape! Remember to commit any updates made but you will want your local “.env” file ignored.
Step 5 - Configure Netlify
Now that we have Rain and Gatsby connected locally we will want to prepare our static host. There are many options available, but we like Netlify because it’s free and easy to set up.
Once you sign up for a free account you will have an option to create a new site. You should see a similar screen as below.

Mediacurrent uses Bitbucket for our git repositories but you can connect to any of the popular Git hosts from this screen. You will want to make sure to select the git repo you set up earlier that contains all of your Gatsby files. When you get to the last step you need to add two additional configuration settings.
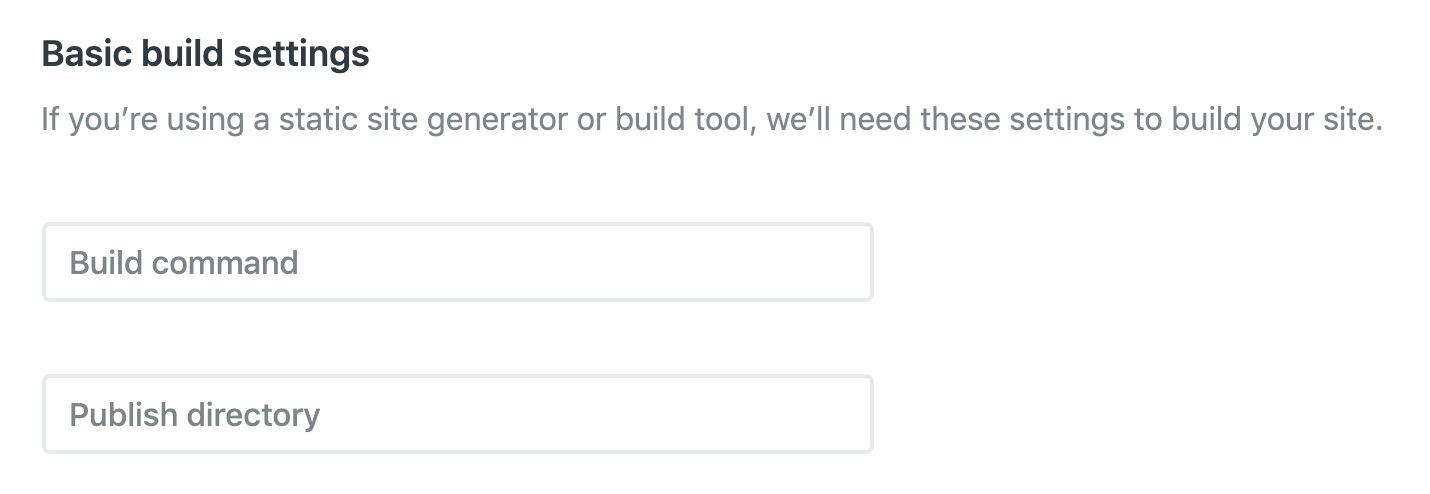
For build command you will add “npm run build” and in the next box you will add “public” as your publish directory. This tells Netlify how to build Gatsby and where your public docroot lives.
Finally, we need to set up our “BASE_URL” variable in Netlify to point to our public Drupal instance. To do this we will add a netlify.toml file to our Gatsby repo with our host name.
Example netlify.toml:
[context.production.environment]
BASE_URL = "http://pathtodrupalsite.com/"
We need to tell Netlify to look for BASE_URL in this value so we will configure that in the “Environment” area on the project settings page. See below:

To give it a whirl, go to “Deploys” and manually trigger a deployment. You will see in the console log whether it was able to read in JSON from your Drupal 8 site. Note: a good option to add some additional security is to add an htaccess password to your Drupal site and make sure that you are accessing that JSON endpoint over https.
Step 6. Connect Drupal 8 to Netlify
By this point we have everything spun up connected but Netlify only builds when we manually trigger a build. In this step, we will point Drupal 8 directly to Netlify so that we can programmatically tell Netlify when to build. This is accomplished with the “Build Hooks” module.
The Build Hooks module is very flexible and can point to any environment which has a URL that triggers a Gatsby build. For Netlify we will be using the build_hooks_netlify submodule that provides direct access to Netlify using their API.
To enable API access we need to create a personal access token from your account. This is found under User Settings, Applications underneath the “Personal access tokens” area of the page. After clicking the “New access token” button you will see the following screen:

All you need to do is name your token and you will be presented with the token value that the Build Hooks module needs to connect to Netlify.
Next we need to create a build hook trigger that is set up underneath the “Build & deploy” settings for your application. This is the URL that we are going to ping from Drupal in order to tell Netlify when to rebuild.

Now let’s hop on over to our Drupal site and get things set up there. After adding and enabling the build hooks module (“composer require drupal/build_hooks”) and Netlify submodule you will be ready to configure the Netlify settings. This is where you will plug in the personal access token just created (see below):

Once we do that we still need to set up the Build hooks environment. We will add a Frontend environment using the “Netlfy” environment type in the Build Hooks configuration.
From there we need to supply a few settings including the frontend URL, Build hook URL, API id and Git branch. The API ID value is found on the main “Site details” page for your Netlify app (see screenshot below).

The interesting thing about the Build hooks module is that we have options for how we want to trigger Netlify’s build. We can manually trigger a build from Drupal 8 clicking a button, or we can auto-trigger builds every time content is saved or after cron runs. For our purposes we can select “When content is updated” but the beauty here is that you could set up a test environment that auto-builds while only updating production when manually triggered. That is the power of Gatsby + Drupal!
One additional step is we can prevent the auto-save setting locally by adding one line of configuration to our local settings.php. This effectively overrides that auto-save trigger. For that you will want to add the following line:
$config['build_hooks.settings']['logging']['entity_types']['node'] = 0;
Wrap-up - Final Testing
The last thing we need to test is to make sure that saving a piece of content in our Drupal host will trigger a new build in Netlify. To do that we click on any sample node on our test site with a small change such as an updated title. The first thing you should see is a message indicating that a change has been pushed to your Frontend environment. If that works we will want to check our Netlify “Deploys” tab to see if the build has been triggered successfully. If you run into any issues, you will want to double check your configuration and Drupal logs for errors.
Still having trouble? For Rain specific issues, please create a ticket in our project issue queue on Drupal.org. For Gatsby related questions or problems, we have an issue set up on our Gatsby + Rain starter repository